
Table of Contents
CIM Email
CIM emails are now being migrated to McGill's central Outlook server, the instructions on this page are subject to change. The legacy instructions are available at the end of this page.
The simplest way to access your emails is through Microsoft Outlook, which can be accessed with the following link: http://outlook.com/mcgill.ca
Access McGill Emails Through IMAP/SMTP
Both McGill and CIM messages can be accessed over IMAP with the following server settings:
- Server: outlook.office365.com
- Port: 993
- Security: SSL/TLS
- Authentication: OAuth2
Sending messages can be done via SMTP with the following server settings:
- Server: smtp.office365.com
- Port: 587
- Security: STARTTLS
- Authentication: OAuth2
Your username for both servers is you @mcgill.ca or @mail.mcgill.ca address with your accompanying McGill password.
Frequently Asked Questions
Some messages seem to be missing from my mailbox
If the Microsoft Exchange flags a message as spam or potentially malicious, it may do one of the following:
- Move the message to your “Junk Email” folder in Outlook
- The message can be placed in quarantine, which you can check by visiting: https://security.microsoft.com/quarantine?viewid=Email
- If it is detected as dangerous, it can also be deleted, in which case it would be impossible to see or find.
Using Thunderbird to Access McGill Emails
If you are starting Thunderbird for the first time, you will be prompted to add a new mail account.
If you already have other accounts configured, you can add a new account by going into settings (click the gear icon ![]() in the bottom left of the window) then account settings, Account Actions, and finally Add Mail Account.
in the bottom left of the window) then account settings, Account Actions, and finally Add Mail Account.

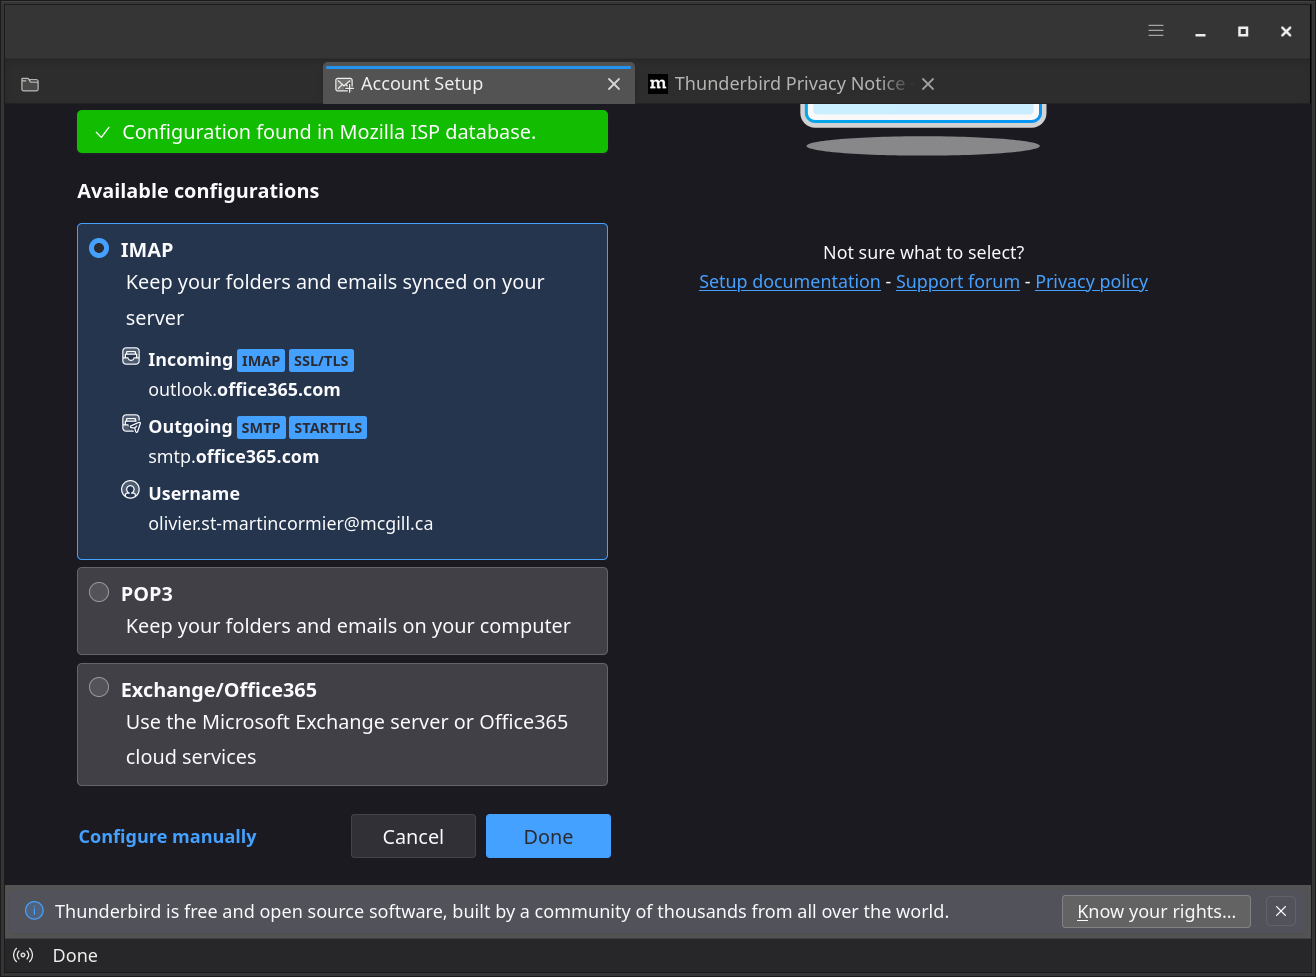
Once the Account Setup screen comes up, you will be prompted for your information.

Once you click continue, Thunderbird should automatically find the correct server addresses.
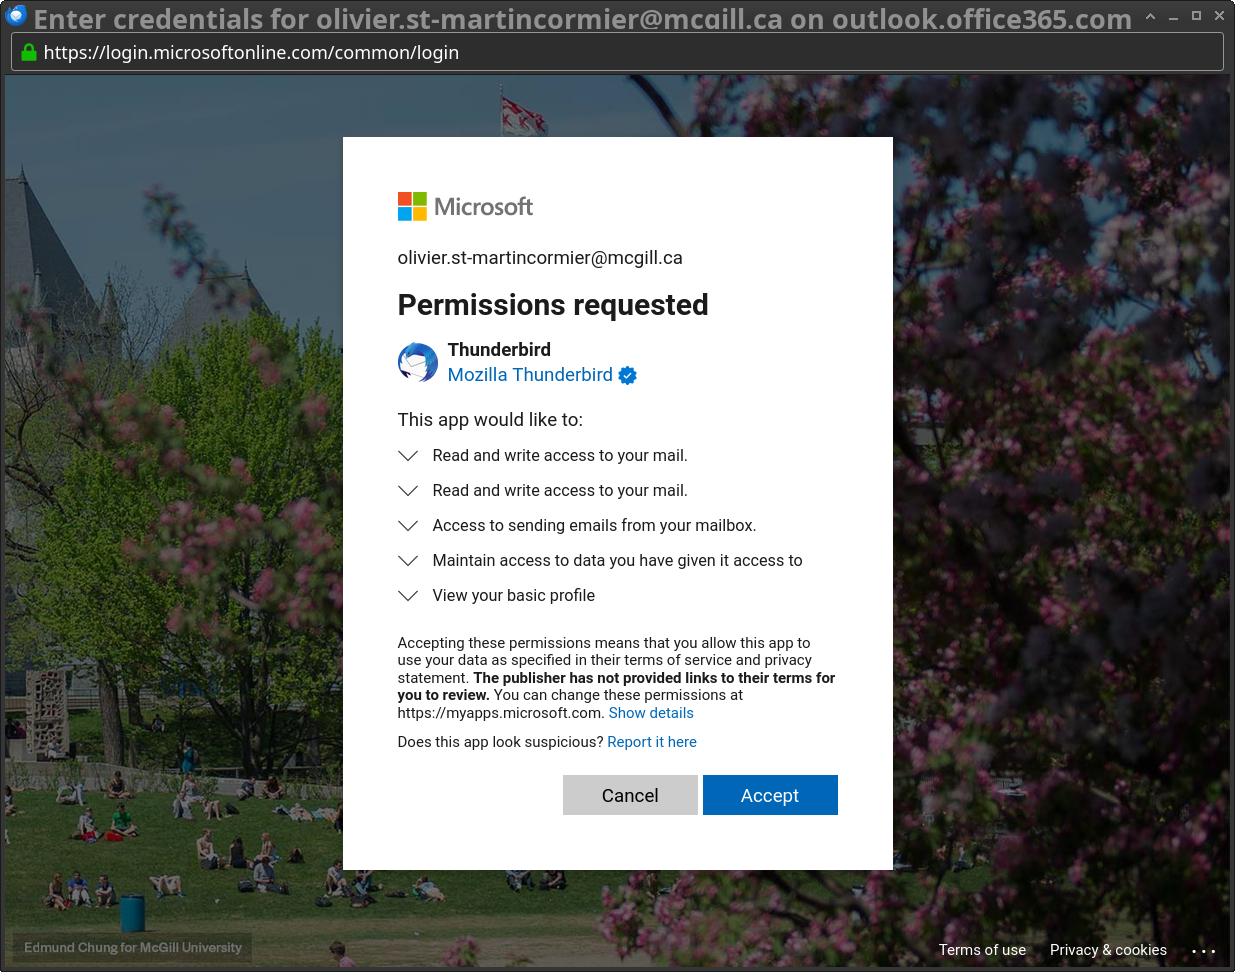
Upon clicking done, you should get a pop up window prompting you to log into the McGill System. In certain cases, you may need to do a two factor authentication via your method of choice.

You will also be asked to accept the permission request to allow thunderbird to access your McGill mail.
At this point, your Thunderbird client should be all set

It might take a few minutes for thunderbird to sync with your McGill mailbox.
Viewing folders
By default, Thunderbird will not show you the folder structure from the Outlook server. To see folders, you will need to “subscribe” to them. To do so, right click on your outlook account and select the subscribe account.

This will bring up the list of folder you have in Outlook. You can select the folders you want to see in your list (or select all of them) and click subscribe. It may take a few minutes for the folders to show up depending on the amount of messages in them and the current sync status of your mailbox.

Sending Emails from your CIM Address
To send emails out with your @cim.mcgill.ca email address, you will need to use an external client such as Thunderbird, as this feature is not available through Outlook.
In Thunderbird, you can define additional identities over your McGill account, which will let you send messages with your CIM address. To do so, go into settings, then “Account Settings”.

In account settings, there should be a button to “Manage Identities”

You will then be able to create a new identity for your CIM email.

Once created, when you send messages you'll be able to select which identity to use.